
Summary
This is a frame for an IKEA GUNDE chair. This is really a great foldable chair, very lightweight and compact, which is important because hopefully one day we will be able to fly FPV RC models with Simchair. Also, it is available worldwide. Latest frame parts upgrade allows the use of IKEA MALINDA pillows for more comfort.
Components
2m * 10x20mm aluminum pipe
1 * IKEA GUNDE chair
8 * M8x65 bolts, nuts, washers, spring washers
Assembly
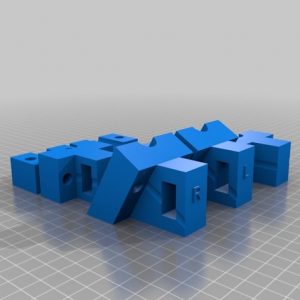
Print it, press fit parts onto the aluminum pipe and use some M8x65 bolts, nuts, washers and spring washers to fix it on the chair.
Hi again – I am unable to source the 6x6x4mm magnets for the gimbal – do you have a source for them that may ship to canada? I can find THOUSANDS of circular 5 X 5 magnets.. 🙁 Hoping you can help! (trying to get all my supplies ready in advance!)
thanks!
Hi! You can either use a 5x5x5 cubic one (it seems to work fine) or I can send a few magnets, along with Lada clutch springs, to you. Shipping from Russia to Australia took 2 weeks, to US – 3 weeks. Haven’t sent anything to Canada yet so can’t tell about how long it will take, but I think something like 2-3 weeks =)
For the frame, what lengths and how many pieces of 10x20mm are required? I’ve got the malinda cushions so I’m guessing that’s adding in two pieces and I know there’s one piece for the collective which is longer as it comes off the side. I’ve gone through all the pictures and a few of the videos and it’s really difficult to see how the bottom is arranged.
Thanks!
It’s a bit hard to measure aluminum parts without disassembling everything, so the best way would be to put it against the chair and measure =)
4 parts are needed:
1 for cyclic, 1 for collective, 2 for the back. For the cyclic mount and the back, please try using an improved v2 part at first:
https://github.com/hc625ma/simchair_models/blob/master/Mods/Frames/IKEA%20GUNDE%20frame/MALINDA%20back%20parts%20V2/STL/ikea_gunde_frame_0.4mm_ikea_malinda_chair_back_mount_v2_ikea_gunde_frame_06b.STL
It should be much better than v1.
Here are some photos of the bottom:
https://photos.app.goo.gl/ceZgYLJhrucrXd4JA
https://photos.app.goo.gl/gtxUXosjn4ZtTzgc7
https://photos.app.goo.gl/q9fsKjpEByJGDqAJ8
Cheers!
I recently made a few pieces, which included measuring these lengths out. Most pieces are 445mm (though 440mm also works), except the collective rail, which is about 540mm, more if you want the collective to be further to the side. I think it would be good to include this information in the instructions somewhere, I had a hard time figuring out how much aluminium I’ll need.
Thanks! Do you mean the frame pieces? Sorry for a late reply, missed the comment.
3/4″ to 1″ square pipe are MUCH easier and cheaper to find in the USA so I’m planning to modify the STL to allow me to use ~19.05×19.05mm (3/4″) OD pipe instead. Are there any places that this kind of change would explicitly not work?
Fantastic design and I can’t wait to get mine up and running!
Thanks mate!
The frame can be made of pretty much anything, the only major problem – you still need a piece of 10x10mm square tubing for the collective, which will be really hard to modify. But the piece you need is rather small =)
Also, pedals, that use 20x10x1mm tubing. Pneumatic mod – should not be a big problem. Let me know if you run into some problems, I’ll try to help =)
Thanks for the quick response! 🙂
I’ve modified the holder for the reinforced cyclic to fit a larger tube as well! I’ll be checking as I go and modifying the ones I need to before I print.
10x10mm is actually pretty easy to find, its just the rectangular tube I couldn’t find anywhere!
That’s good as every spare millimeter is used in the collective 😀
Glad you’ve sorted it out, let me know if you need help!
Printed the modified parts for the cyclic frame mount.
Aluminum was cut to 16″ (405mm).
Fits great! Might also recommend that the outer corners of all of the frame mounts be chamfered since they are rather pointy 🙂 I went ahead and tapped them against my belt sander to soften them up a little so they wouldn’t scratch!
I think I made it simpler to make them stronger and easier to print =) Have to look into it.
Would be cool if you share modified parts =)