
Simchair MKIII cyclic has quite a useful feature – the pseudo force trim system. It mimics the use of similar systems in real helicopters, but with some degree of adaptation to a simulator use, to make virtual flying experience better.
Lets look at the UH-1 Huey as an example of the helicopter, equipped with a magnetic force trim system. At firts, lets see how it works in a real one!
Real life use
When you flip the FORCE TRIM switch on, cyclic and pedals will be returning to their current position, and you will feel some resistance when moving the stick around. You can relieve forces from cyclic by pressing a button on the stick grip. Cyclic becomes weightless while you hold the button, and after you move it to the desired position and release it, it stays where you leave it. Now, magnetic brakes will return the stick to its new “default” position we’ve just set. Note, that there’s no such thing as “trim reset” in a helicopter- you simply retrim it to a particular position you want. How do you find that position? It’s simple: its the position of controls, at which the helicopter is going where you want it to! =)
So, the main purpose of the force trim is reducing pilot’s workload. Does it mean, that the helicopter will fly itself? Not at all! Helicopters are very unstable things, so you still can’t expect it to fly without pilot’s input. You still need to correct its attitude with cyclic and pedals. But you can take your hand off the cyclic for a shot time! Now, in a real helicopter, there’s a thing called pilot induced oscillations (PIO). With force trim off, your hand vibrates and moves with the rest of helicopter, and that may affect smoothness of your ride and cause you to overcorrect, if the force trim system is disabled. That’s why some pilots recommend to never turn the system off. Yet, there are a lot of pilots who prefer flying without any forces on cyclic, so both options are realistic and can be used.
But, what if I want to make the helicopter fly by itself? – You need some kind of SAS system (autopilot) which is a totally different thing. It’s really expensive IRL, so not every helicopter is equipped with it.
Well, enough about real-life stuff, let’s talk about simulators, hardware, and available options.
Sim use
A bit of history
For quite a while, starting from FS9, maybe even earlier, people have been removing springs from their joysticks to fly helicopters. Why? Because helicopter controls were a lot more sensitive than those in airplanes, and springs often caused some weird axis cross
Using force trim with springless cyclic
I was quite surprised later when a few real-world pilots told me they often do the same thing exactly because of similar reasons by turning force trim system off (where it is present and can be turned off) and enjoying flying with no forces on the stick (it still has some resistance that depends on the type of a helicopter). Then they told me that this system is really useful and much needed when on the ground (we don’t want to chop peoples heads off, and we don’t want hot starts because of rotors spooling up slower than usual, because of some pitch in blades that is there because of uncentered cyclic and pedals!). When testing the gimbal, I’ve noticed the same thing – when I wanted to go pour myself some tea between some formation flights in DCS Huey, I had to shut down the engine before I could take my hand off the stick because otherwise, I was risking to chop my tail off. That’s when I understood we needed some kind of a force trim emulation for the springless cyclic that would allow taking the right hand off the stick grip.
So, I decided to implement it in a simple way – when the pilot presses the force trim button on the stick (the top red one by default) it blocks input from cyclic and pedals – controls in the sim will stay where they are until you release the trim. But what happens when he decides to release the trim? The stick will be in some random position, and the sudden cyclic move will probably cause rotor blades to meet the tail boom, with subsequent separation of all parts involved. We don’t want it to happen, right? That’s why the current position of physical stick and pedals is mapped to the position of the virtual controls on the second press of the button.
Now, as we’re flying a helicopter, you still need to make small corrective movements with the cyclic. You can use B8 stick hat switch to move the trimmed stick “electrically”! While in trim mode, it won’t be pressing joystick buttons but will move the trimmed position of the cyclic instead, by a minuscule amount. So you can fly your Bell 407 with the hat switch in cruise, “click-click-click” it, like in a real one! =)
Using force trim with spring-loaded cyclic
With a spring-loaded cyclic, using force trim is really necessary. Without it, flying won’t be realistic – and precise. There’s no point in fighting with a tension of springs – in a real helicopter you either turn the whole system off (springless cyclic!) or use it properly.
Obviously, you can’t reproduce full-scale magnetic brakes system of the real helicopter without using some complex mechanics under the deck, which will instantly move the price from affordable to too-expensive-to-consider for most of us. Having the “deck” means having a dedicated space for a flight simulator in your room, which often means having a separate pc for the setup to stay usable, and these things considered together are something that most of us generally try to avoid. I wanted to have something simple, yet reproducing (to a certain degree ofc!) the real force trim system behavior, as it is in fact really useful to fly helicopters (unless you use SAS system of some kind).
What I decided to do was to start with a simple fact: no forces should be present on the stick in cruise flight. With a spring-loaded cyclic, the only way this can be possible is by having it centered at all times. But how do you fly with a centered stick? Easy! You can assign different positions of an axis indicator to a physical center of the stick!
With recent changes to the force trim system, both cyclic variants work similar, except for, with a spring-loaded cyclic, you hold the button while moving the physical stick to its new position. So, you press the button and hold it, controls freeze, you move the stick to your desired position (in the case of a spring-loaded stick logically it should be close to the center where you don’t feel tension of springs), release the button, and the position of cyclic and pedals where you have released it becomes mapped to the position of on-screen controls that was locked and recorded when you pressed the button.
How it works
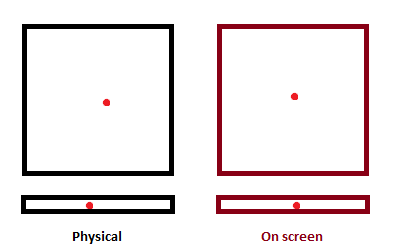
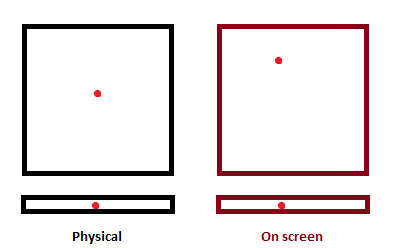
Let’s look at how it all works in practice. For the next part of this tutorial, I will introduce 2 additional concepts: virtual controls and physical controls. Virtual controls are your cyclic and pedals you see in the cockpit; physical controls are your Simchair stick and pedals. Let’s call the position to that our physical controls are returned by springs – the physical center position. Note that we will use a slightly exaggerated example – physical and virtual controls should be aligned by mechanical means (spring holders adjustment) for normal operation!
Let’s imagine that we are sitting in the 407 and preparing to start the engine. Flight manual says that cyclic and pedals are to be centered before attempting startup and shutdown. Our stick and pedals are in some random initial positions. Here’s how it looks on axes positions indicators:

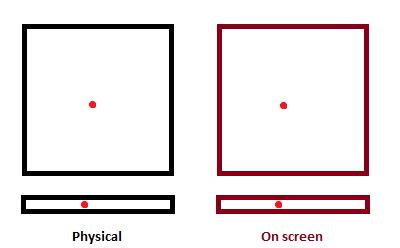
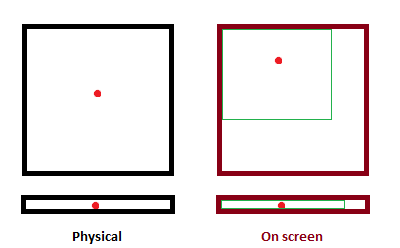
We see that the “cyclic centering” light is on, and our manual says it should be off. Obviously, we center the pedals and move cyclic to the position where the light will go off:
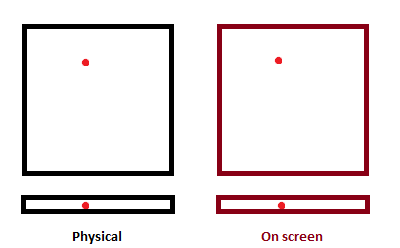
Now, we can see that our physical controls position is slightly off their center (so we feel the tension of springs!) and our virtual controls are centered perfectly. What we want to do it to preserve our virtual controls position and map it to the center of our physical controls. Here’s how we do it:
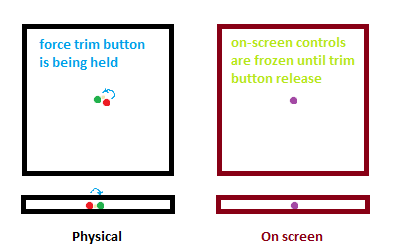
- We press the force trim button and hold it. Controls on the screen will freeze.
- We move controls to the center (or any comfortable position for the springless cyclic) and release the button.
- Controls will unlock, and the position of on-screen controls will be mapped to the current position of physical stick and pedals.
If we want a super-small, precise stick adjustment – we can use a hat switch of the B8 stick grip. Simply press it in the direction you want a few times to move the position of the magenta dot of the cyclic. It makes a very minuscule (adjustable!) correction. Again, we can fly our 407 with our cyclic grip hat switch alone, click-click-click!
Now, what happened is, we have just mapped our current on-screen stick and pedals positions to our desired (physical center in case of a spring-loaded cyclic) positions of physical controls. That means we don’t feel the tension of our springs anymore. And that’s what we wanted to achieve!
Using trim in flight
Let’s look at it again. Our controls are now centered, so we start the engine, and after 2-minute warm-up, are ready to take off. we press the left pedal, pull the stick back gently, bring her light on her skids, and finally lift from the ground. Here’s how our controls look at this point:
Let’s imagine we need to taxi to the active runway, so we will have to hover in ground effect for a while, and want some added comfort while doing this. Let’s trim! So, we press and hold a force trim button, move the stick, release the button, and…

…we can see that our current position of controls we have chosen for hover is now mapped to the center of our physical controls! So we can now hover with our stick centered (we may need to press the hat switch a few times to find a perfect spot)!
Now, let’s look at how it will look in cruise flight! It’s usually hard to stay focused on the ball (and thus, maintain heading and attitude!) when flying long straight route legs in a sim, especially in an aircraft, controlled more like with telepathy rather than moving the controls! That’s where the trim system really shines. Let’s say we fly at 100 knots, controls position diagrams without trim will look somehow like this:
Without trim, we have to counter tension of springs, which is quite strong at this particular position of the stick and pedals. Our movements become less precise, the hand gets tired, we have to watch the ball closely, altogether these factors result in constant deviations in heading and altitude! Now,
After we have trimmed the heli, our controls positions we have chosen for cruise flight are mapped to the physical controls centers. This means we can sit relaxed and control the heli with the pressure of our fingers! The ball will be centered, and it will be much easier to maintain a desired attitude, altitude, and heading! Also, for VR users, that will basically mean that every time you trim, forces will be relieved from cyclic and pedals, just like in a real helicopter. When you wear a VR helmet, you can’t see your physical controls, so it’s quite realistic!
Time to talk about landing, and some limitations of the system!
An important thing: BEFORE LANDING, RETRIM CONTROLS TO CENTER! Why? that’s because, although you can assign any red dot position as an axis center, axis boundaries will actually stay the same! Let’s mark them on the diagram:
You can see, that your controls movements become limited when they are close to axes boundaries. How bad is it? Does it affect flying? Well, not really. Controls in helicopters are so sensitive, you basically apply pressure to them rather than move, so it’s not really noticeable in normal flight unless you forgot to trim it before landing! In this case, when you’ll drop out of the translational lift, and wind effects will become more pronounced, you may find that you’re running out of the left pedal, and the stick is inclined way too far back. To avoid this, simply retrim to the center before slowing down for landing. If things go terribly wrong, remember, you can always reset the trim with a double-click of the hat switch.
Finally, how often should you re-trim?
Basically, every time you turn, or change the flight mode, or if the wind changes. Trim the heli every time you feel that you have to move cyclic too far from the center and begin to feel the tension of springs. Trim it when the ball is not centered anymore. Trim it until you stop noticing it and simply do it as a part of flying.
That’s pretty much it, enjoy flying!