After a week of testing, I can say that the lever is now good enough to be released. You can download it from hc625ma.org or thingiverse. Assembly and test flight videos, along with the manual page will follow shortly, stay tuned!

3d printable flight simulator hardware and RC vehicles
After a week of testing, I can say that the lever is now good enough to be released. You can download it from hc625ma.org or thingiverse. Assembly and test flight videos, along with the manual page will follow shortly, stay tuned!
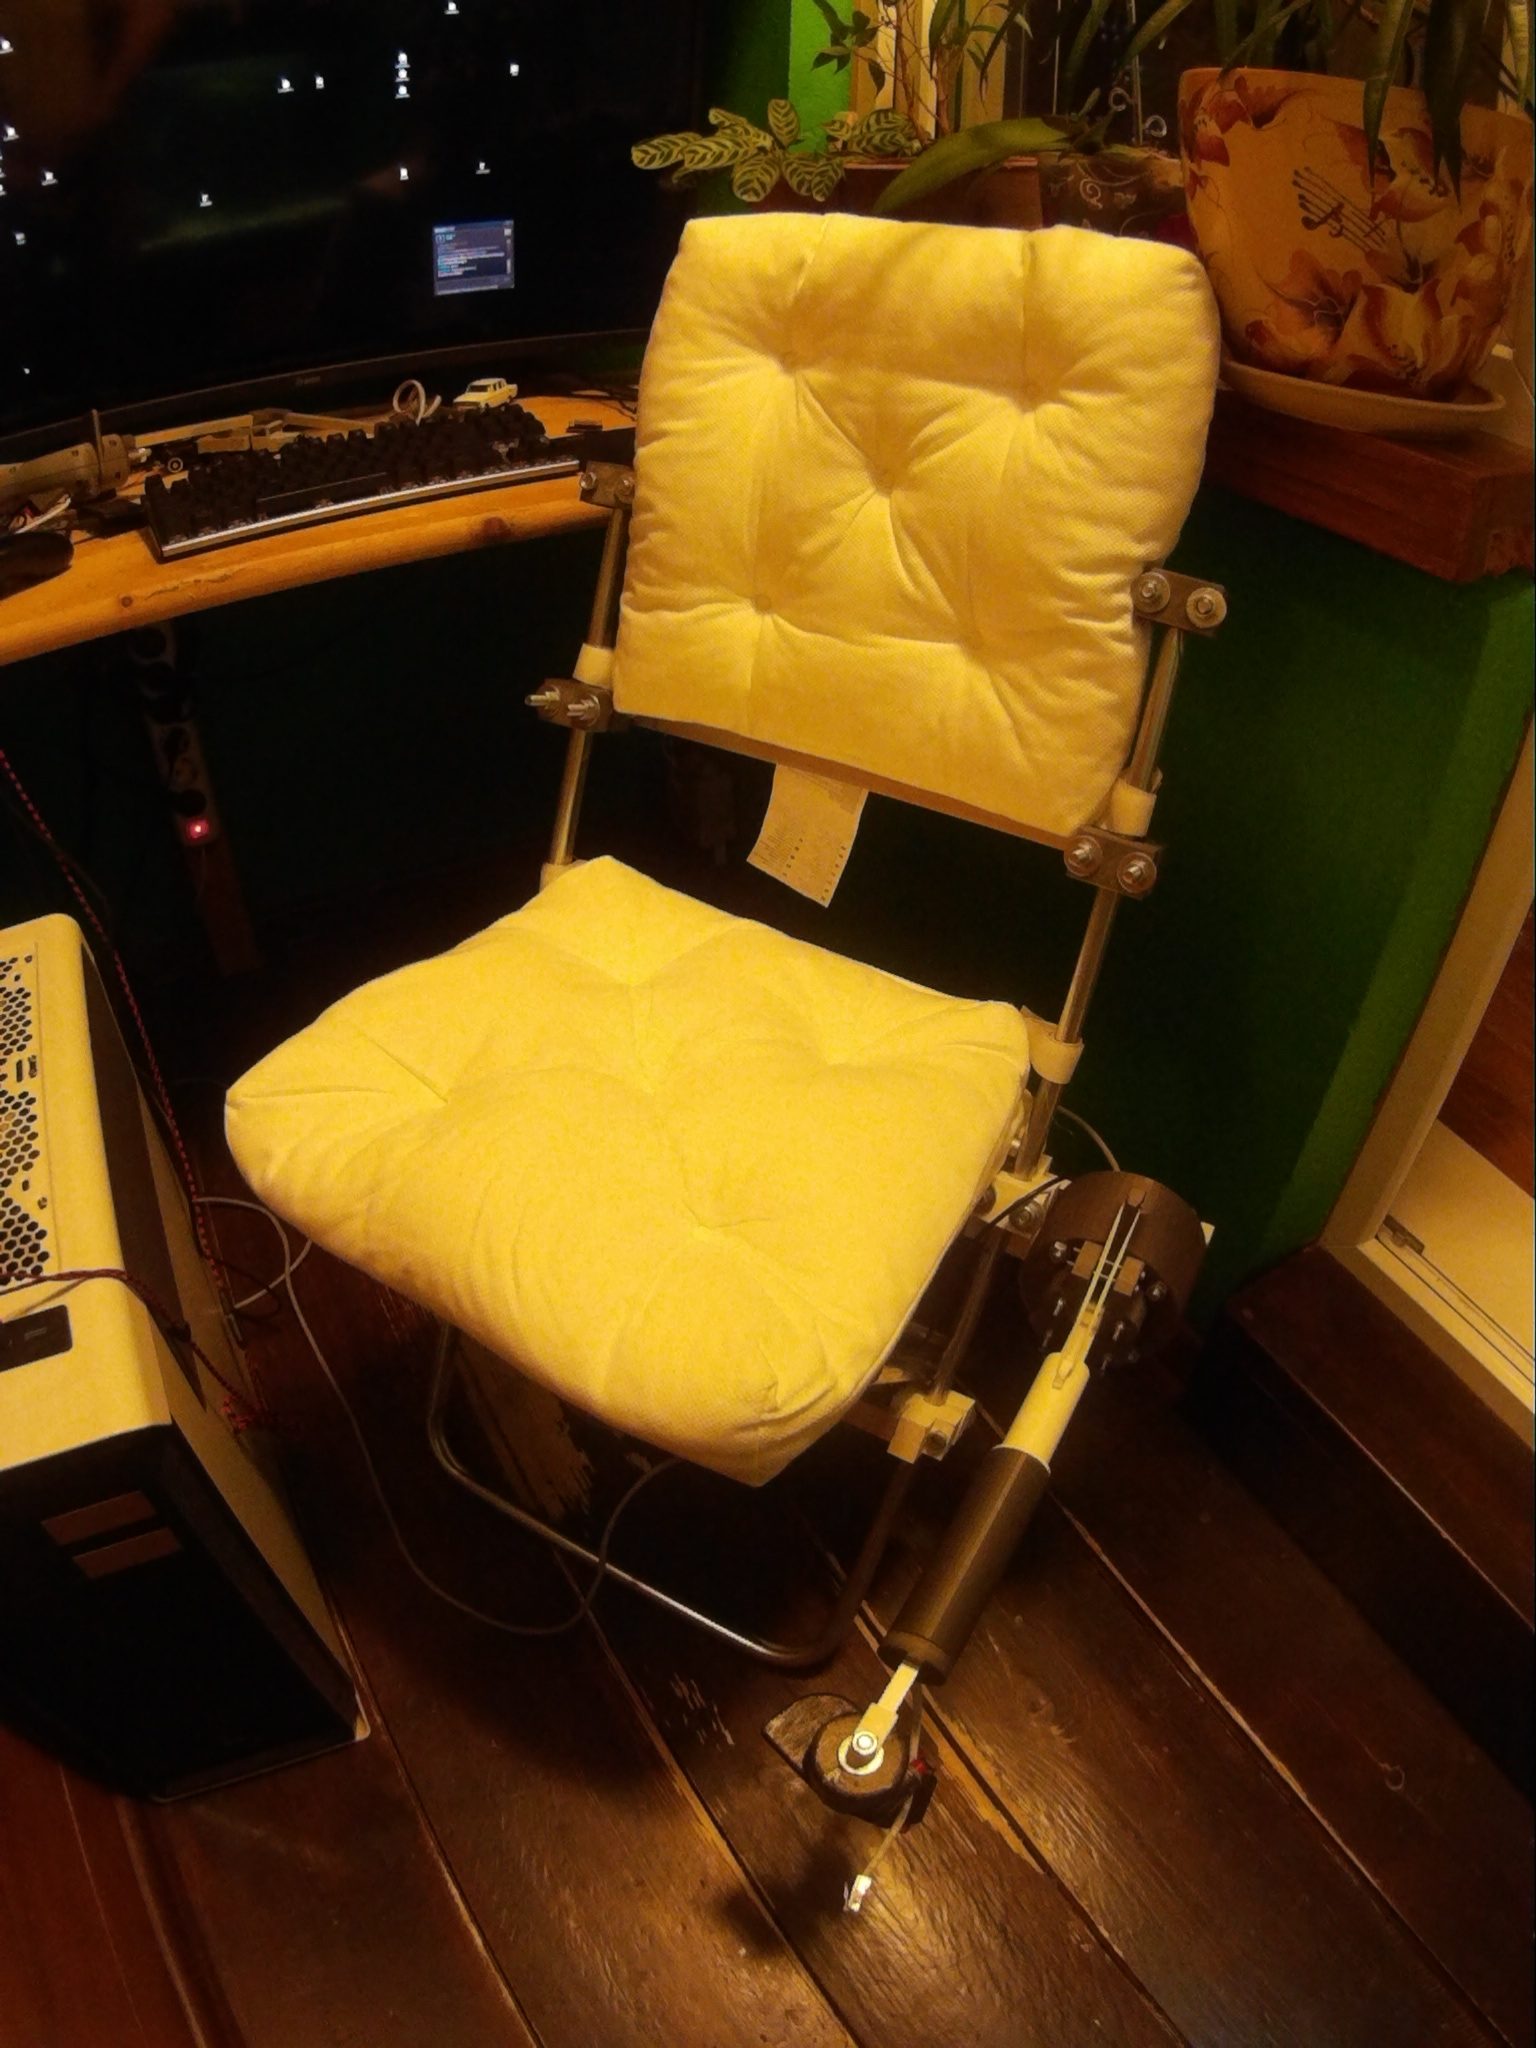
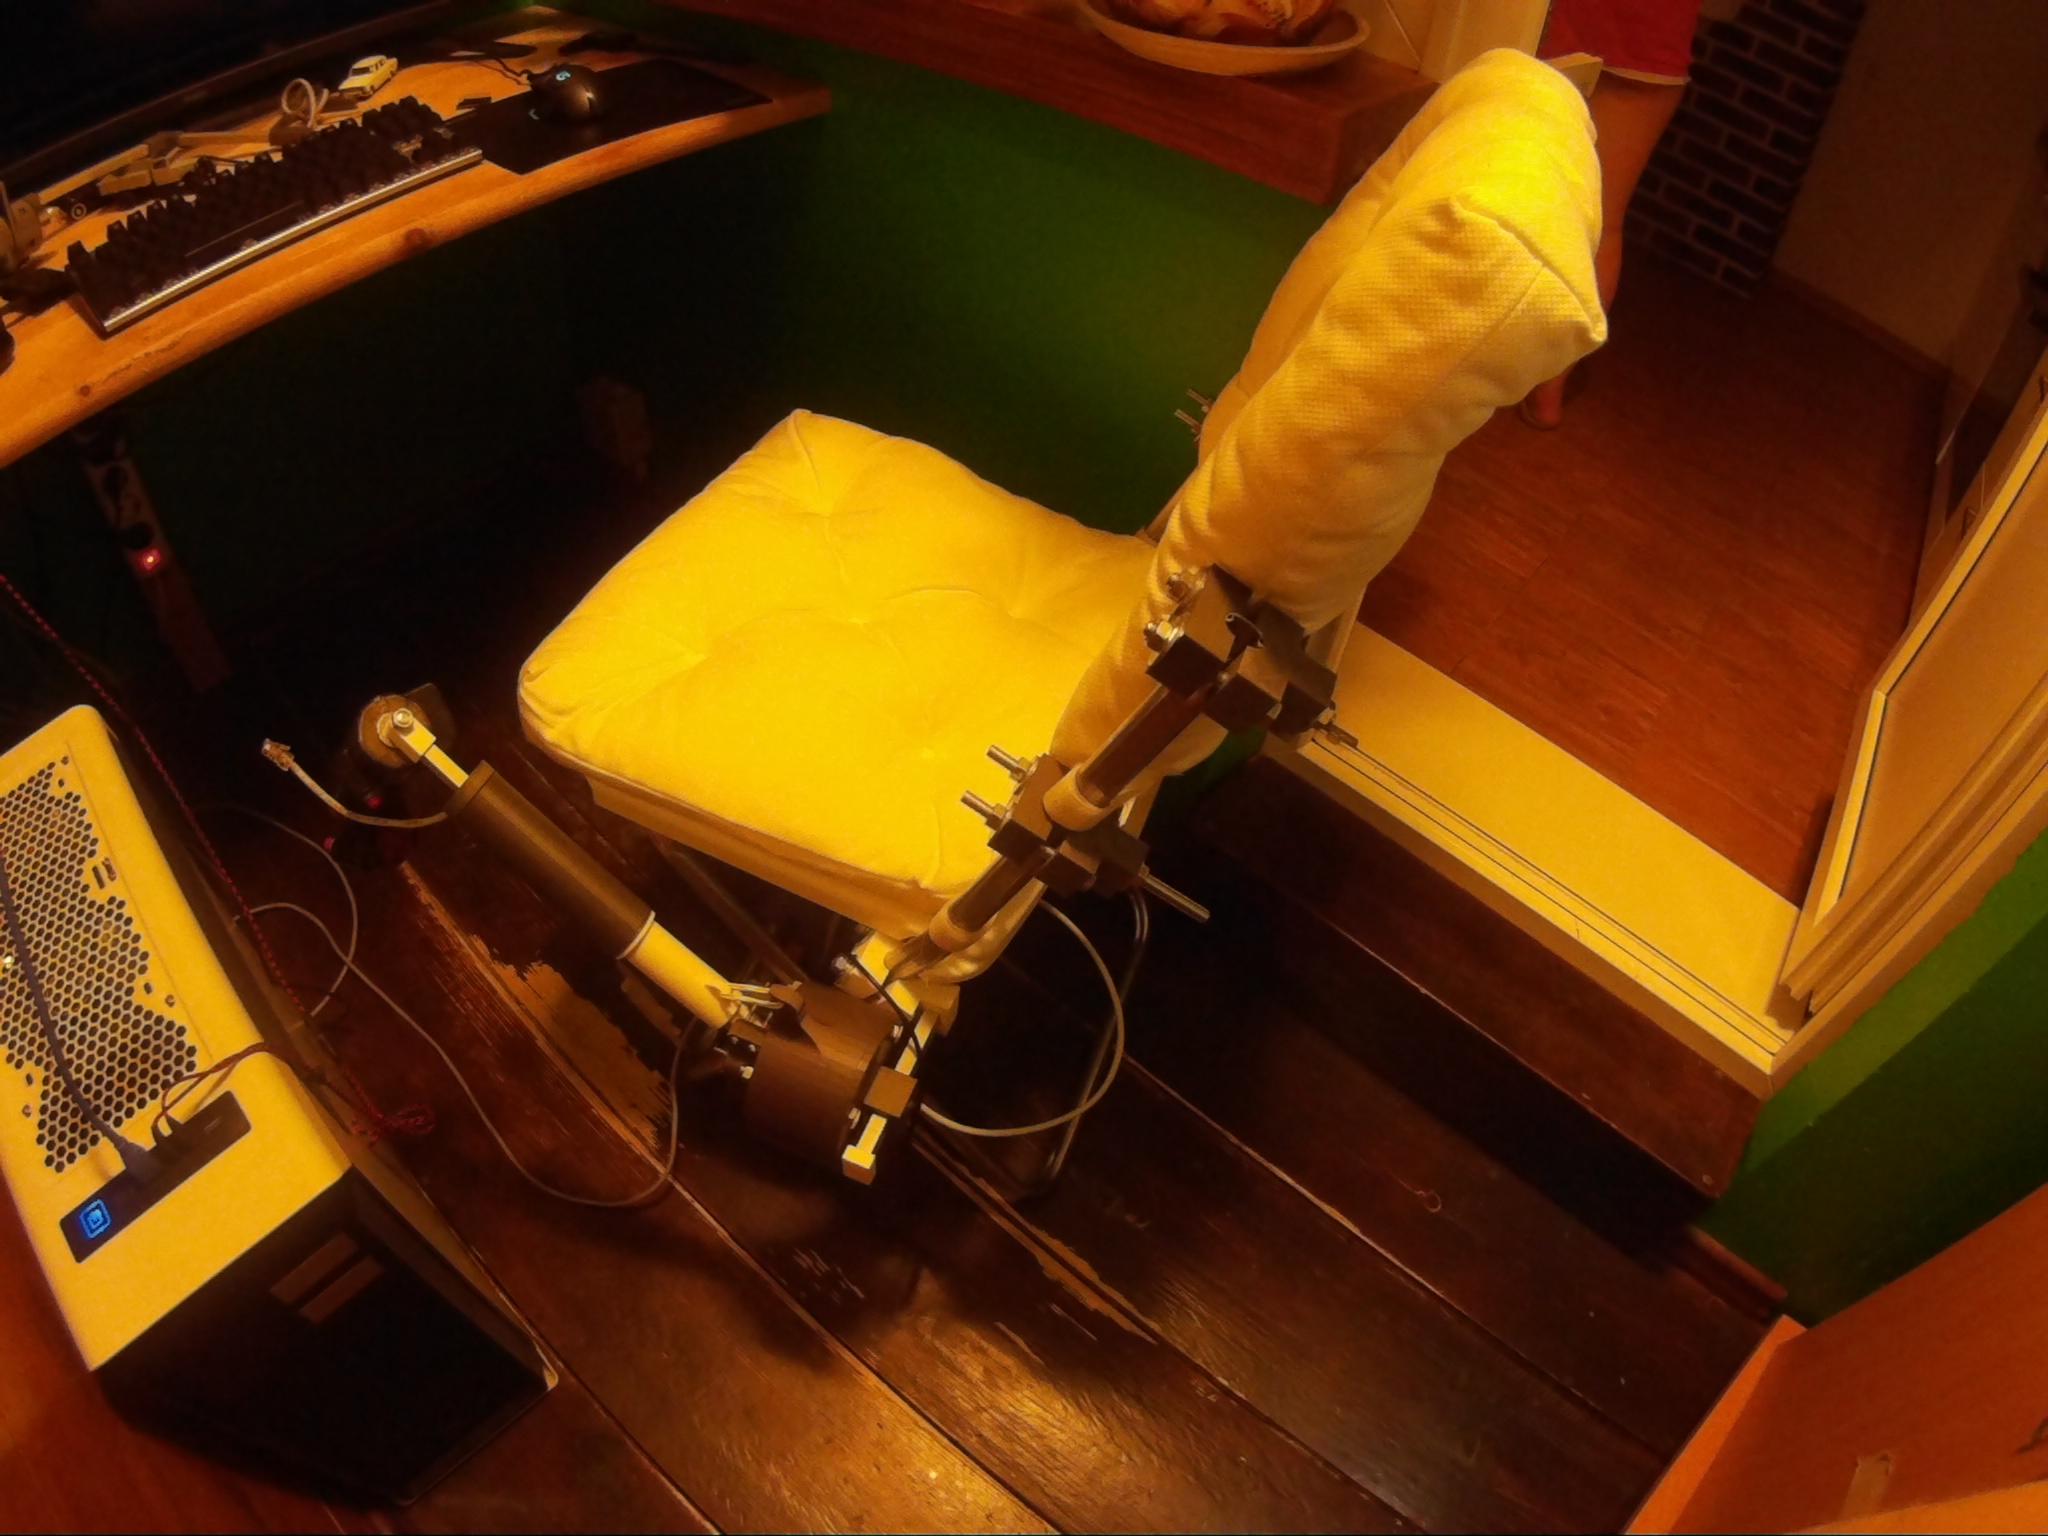
An upgrade for the IKEA GUNDE chair that serves as a frame for Simchair components starting from MKII version (it was used in MKI version as well, but the frame was a separate piece of steel then). This particular chair was chosen because it’s very lightweight (something around 1 kg), it’s foldable, and it’s cheap. It is important, as Simchair will support flying FPV RC aircraft in the future, so one has to be able to carry stuff to the field. I use it not only as a flight chair but as a work chair as well, so I decided to make it more comfortable. You can fit two IKEA MALINDA pillows to it, using the 10x20mm aluminum rectangular pipe with new printed parts. I find it quite comfortable and will probably add parts for several back angles to choose from. The current inclination of the back is the same as in the original chair.
I have added new parts to the frame_parts.zip archive.
Cheers!
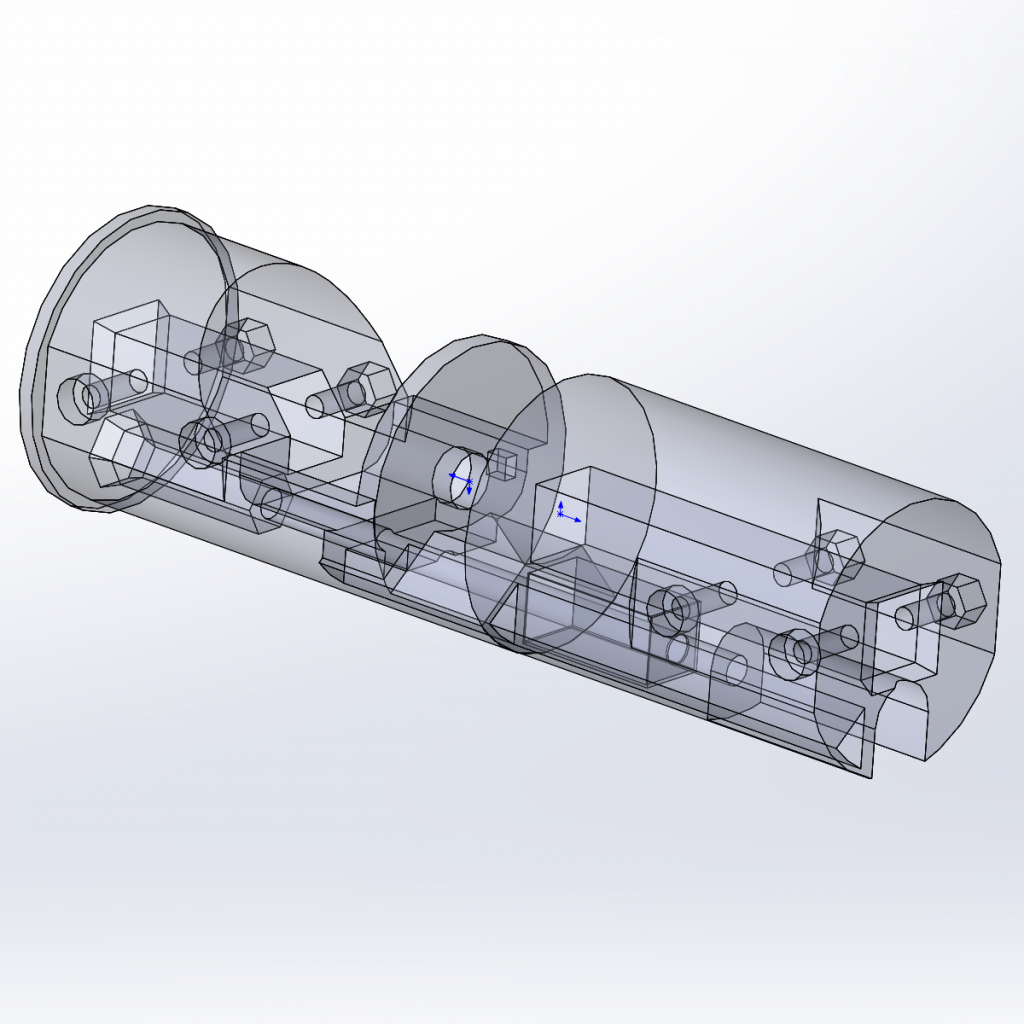
I’ve been working on the new lever for some time, and it’s very close to release now. This lever is a successor of the twin throttle 412 themed lever with some improvements, which simplify assembly process by a considerable degree, yet significantly increase its strength and, most importantly, rotation smoothness. Because of a new tensioner with rubber bands added to it, the lever can hold any type of a head of large enough weight and still feel as light and smooth as the simple one!
I’ve been able to fly with it today for a while, with my old cyclic grip used as a head mockup (to simulate a head’s weight) and it feels just right. It can be set up so that the tension is barely noticeable even with an object as heavy as this dummy cyclic grip. This lever has 200-degree throttle travel range. After a few days of testing, I will release it along with an assembly and demo flight videos.
I have added support for a new lever to simchair software. Check it out on GitHub!
A short video on how to calibrate and flash Simchair MKIII i2c peripherals, and how to upload firmware to the master controller. Note that configuration section is documented in sketch comments and on the software page. You can use any cheap Chinese USB-UART interface like this one to program Arduino Pro Mini boards. Your questions are welcome, if you need help with flashing stuff, let me know.
Cheers!
I’ve been told by a Huey pilot that in a real helicopter force trim effects both cyclic and pedals, so here’s the hotfix!
It is now a default option, but you can disable it by setting PSEUDO_FORCE_TRIM_EFFECTS_PEDALS to 0
Download an updated .ino file from GitHub.

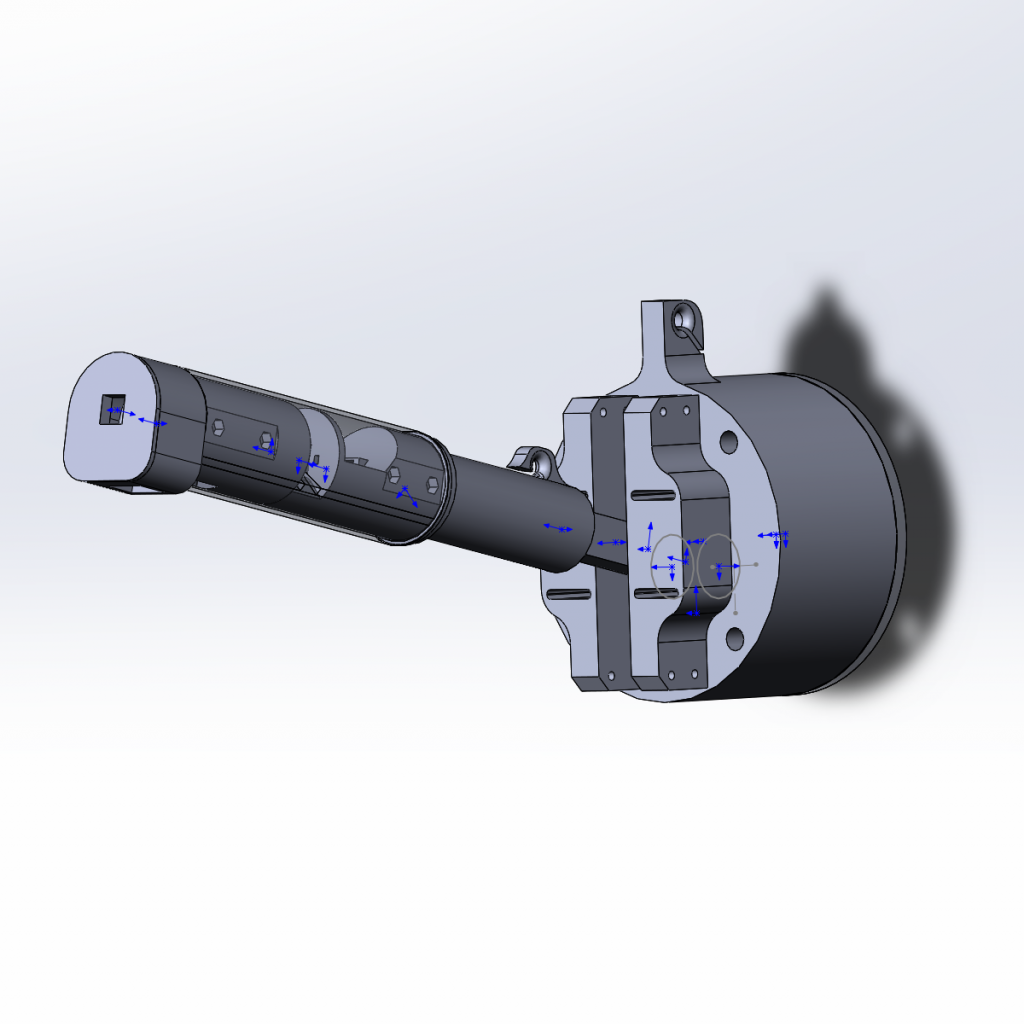
An idea on a better tensioner for a variable load (different heads). Along with a usual tensioner, it has hooks for rubber bands. You can adjust rubber bands number until tensioner can hold it with the minimum force. I have quickly tested it on a twin collective; it seems to work. First prints show that 40MM diameter allows for a much stronger frame, and I’ve been able to fit a cable channel in it! Will finish printing the first prototype in a couple of days.
Stay tuned!
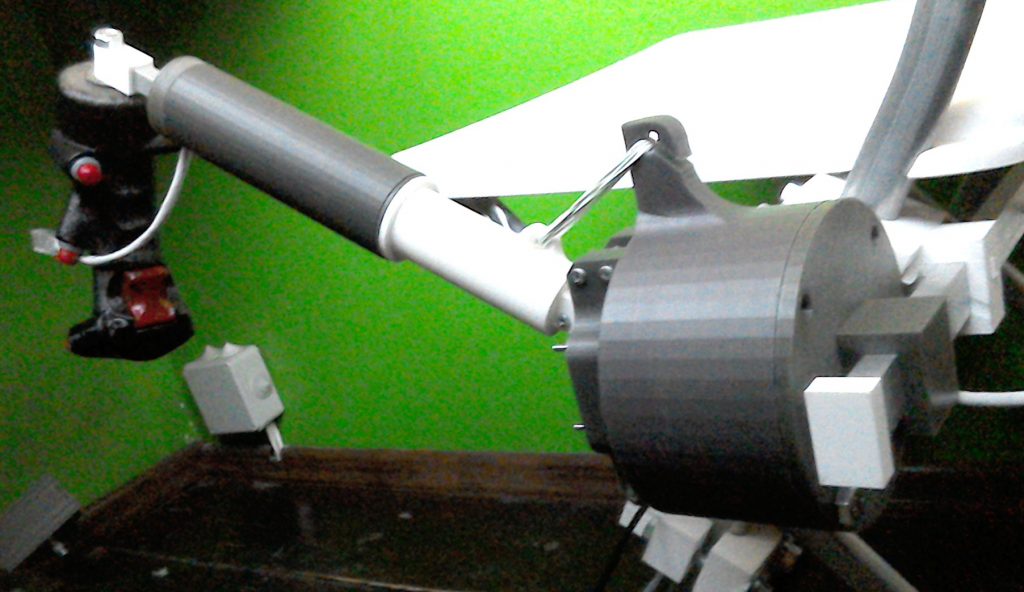
It is an improved 200-degree turn throttle frame. The frame diameter was changed to 36mm, so overall throttle grip diameter will change to 40mm (like in a real Huey). That change was made to improve the structural strength of the unit. The I2C upgrade allows for some interesting things here, so I will try to make some kind of an idle stop button (most likely a software one).
Along with “FORCE_TRIM” sensitivity switch mode, I decided to add an actual force trim feature. There are two modes available: INSTANT and ADAPTIVE. The first one will disable the trim when you press the button, and the stick will turn to where you hold it. It will often result in a weird maneuver, as it’s hard enough to put a stick in an exact same place where it was when you trimmed it. That’s why an adaptive mode is there! When you press the button, the stick freezes, and will only move again after you press the button, AND the stick will be within the given range of deviation from the trimmed position! You can give the range in percent; I think a value of 5 or 10 is a good point to start. Note that you have to press the button once and then move the stick to a trimmed position, it will move as soon as it reaches a given deviation range.
If you ever get into trouble, SENS_SWITCH_TRIM_EMERGENCY_RELEASE is there to help. With it enabled, just press the SENS_SWITCH button to instantly release the trim regardless of cyclic position.
I advise you to use SENS_SWITCH_MODE TOGGLE along with the ADAPTIVE trim setting; this is a default setting. Note that though this is not the exact way trim works in a real heli, it is probably the best thing we can come up with for a non-FFB stick. I have tried it in a short flight and was fairly satisfied with how it works.
Please share your thoughts on how force trim should be done on a non-FFB stick!
Download an updated .ino file from GitHub.
For when you need Teamspeak or some other external software for your comms, enable PTT_KEYBOARD_PRESS and set your desired keyboard combo. It will disable one of joystick buttons (you can choose which one, trigger PTT it a default setting) and press the selected keyboard combo instead.
#define PTT_KEYBOARD_PRESS 0 // set to 1 to enable keyboard combination press instead of a joystick button
#define PTT_BUTTON 4 //1st button is 0, 4 should be PTT trigger position
// this should press CTRL + Q
#define PTT_KEYBOARD_KEY ‘q’
char PTT_KEYBOARD_KEY_MOD = KEY_LEFT_CTRL;
Download an updated .ino file from GitHub.